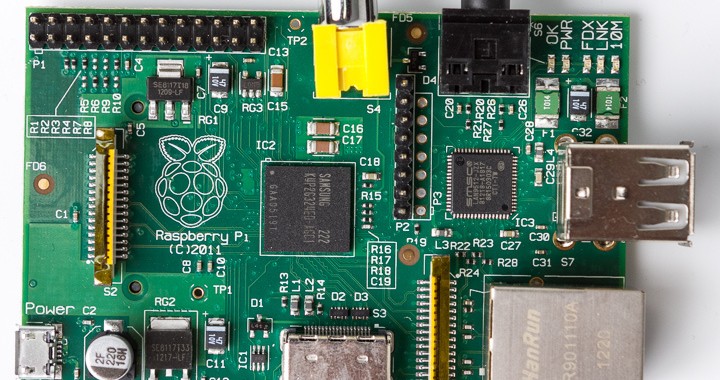
Anyone who knows me knows I’m a Raspberry Pi enthusiast. One of my first Raspberry Pi projects was to see if I could run a web server on a Pi. So, I installed my LAMP stack, installed WordPress, etc. Several days later, I had the very first iteration of this website running on a Raspberry Pi from my home office. Then, one day, I came home to find my website was not responding. No big deal, I thought – I’ll just give my Raspberry Pi the old reboot and everything will be fine. Boy, was I wrong – after unplugging my power chord and plugging it back in, all I received was a solid red power LED and nothing else: no blinking green activity light – nothing.
Now, one could argue that running a web server on a Raspberry Pi is a bad idea, and running a web server on a Raspberry Pi without a backup, doubly so. In hindsight, I’d be inclined to agree; but this whole thing started as an experiment, just to see if it could be done. Never-the-less, I ended up investing several hours of work into it and wanted to see if I could bring my project web server back to life. The first thing I did was grab an Ubuntu live USB drive. I booted my laptop up with the USB drive installed and, after selecting ‘USB Device’ from my BIOS boot menu, I was greeted with the familiar Ubuntu desktop. I held my breath and plugged in my failing SD card… Nothing. It didn’t auto-mount. Undeterred, I opened up terminal window and ransudo fdisk -l
The results of the command were promising: the system recognized the SD card and both partitions; they showed up as /dev/mmcblk0p1 and /dev/mmcblk0p2. I attempted manually mounting them, but sadly, this failed, so I tried running the file system consistency checker:
sudo fsck -y -v /dev/mmcblk0p1
and
sudo fsck -y -v /dev/mmcblk0p2
The command completed and everything looked good, so I removed the SD card and reinserted it. Ubuntu auto-mounted the partitions and my data was available to copy – progress! I copied all the data from my SD card to a secure location and promptly ran
sudo dd if=/dev/mmcblk0 of=/path/to/secure/location/sd_backup.img
After this completed I figured I’d try to boot my Pi from the SD card again, now that the file system was repaired, mountable, and seemingly working. So, once more I powered on my Pi, and once more I was disappointed – I got the same result: red power LED and nothing else. At this point, I decided to exercise a bit of Google-fu and came across two blogs regarding this issue: this one and this one.
The solution outlined in both blogs was essentially the same: check the file system for backups of the superblock (apparently periodic backups are taken and stored in a different area of the SD card) and, once located, try replacing the existing, presumably corrupt, superblock with one of the backups. Sounds great, right? I thought so too, so I excitedly popped my SD card back into my laptop and fired off the commands below:
sudo mke2fs -n /dev/mmcblk0p1

sudo e2fsck -b block_number /dev/mmcblk0p1
I tried restoring every backup of the superblock that was found on the SD card, but sadly, none of them worked. I was just about to come to terms with being doomed to rebuild the whole website from scratch when I had an idea. I had another SD card laying around, so I popped it in and imaged it with a fresh copy of Raspbian Wheezy. Once the image process completed, I compared the boot partition (/dev/mmcblk0p1) on the freshly imaged SD card to the boot partition on my corrupt SD card and, sure enough, they were an exact match! Quickly, I ran the dd command to image just the partition containing my data (/dev/mmcblk0p2) like so:
sudo dd if=/dev/mmcblk0p2 of=/path/to/secure/location/data_backup.img
I then re-wrote the corrupt SD card with a fresh image of Raspbian. After the image process completed, I removed the SD card from my laptop, inserted it in my Pi, and plugged in the power chord. It booted! But, I was back at square one, of course. So, I expanded the file system, exited the setup utility, and logged in with the default username and password of: pi / raspberry. I then shutdown the Pi properly (using ‘shutdown -h now’)and pulled the SD card.
Finally, I plugged the SD card back into my laptop and ran the final command
sudo dd if=/path/to/secure/location/data_backup.img of=/dev/mmcblk0p2
After this completed, I booted up the SD in my Pi and rejoiced as I logged in using my original username and password. I poked around the file system a bit using ‘ls’ and ‘cd’ and all my files looked to be there! Best of all, I opened a browser on my laptop and pointed it to the original IP of the Pi and there was my website! What a relief! Of course, the first thing I did once it was back up and running was get a proper backup of the mysql databases – lesson learned!Brian Dunham is a Cisco and Microsoft certified network and systems engineer with over a decade of experience in the Information Technology field. When he is not in front of a computer he can be found out in the wilderness canoing, hiking, fishing, or camping.
Contact: brian.dunham@netris.us
